ActiveCampaign MCP + ChatGPT
How to connect ChatGPT to the ActiveCampaign MCP Server

Custom MCP connections are available on any paid OpenAI account.
If you have a managed ChatGPT
account, please ask your administrator to set up and
approve this connection for your organization.
Step 1
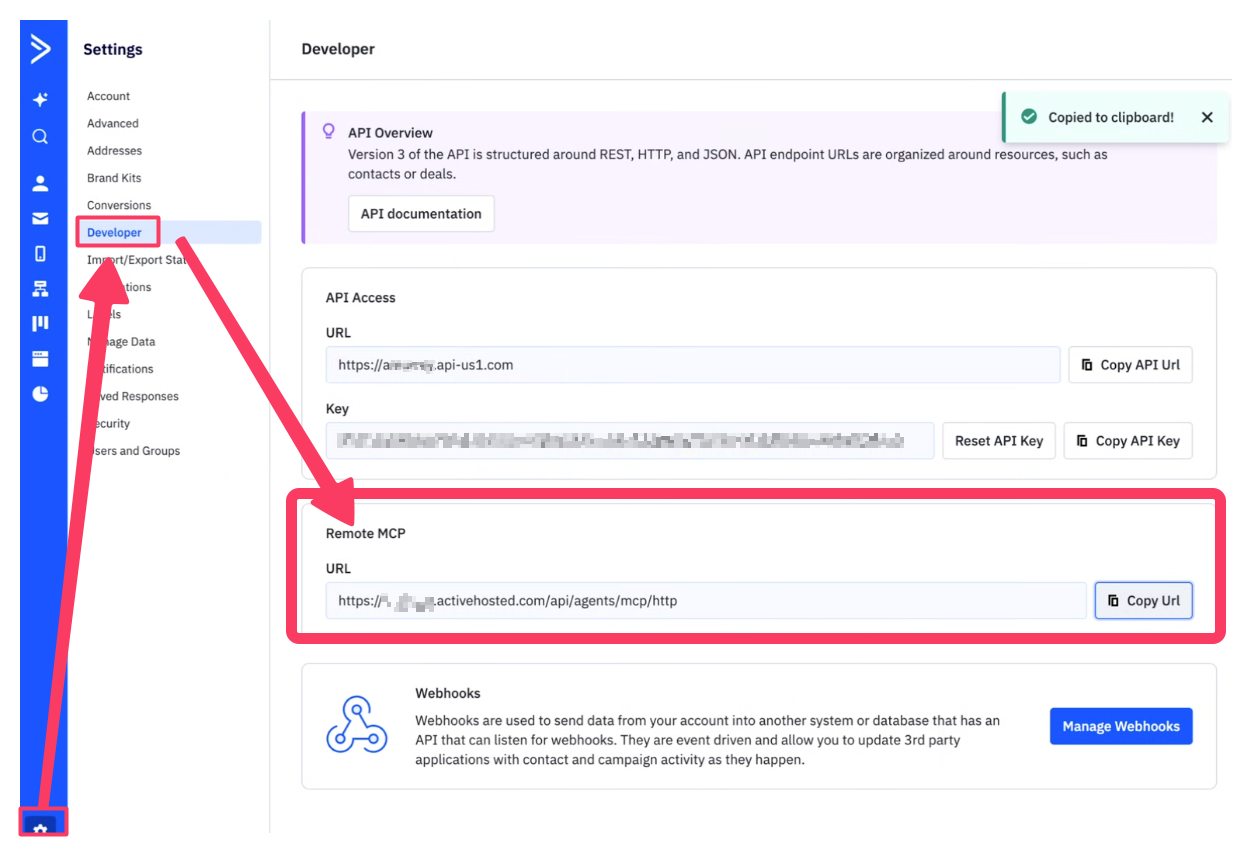
In your ActiveCampaign account, select ⚙️ Settings -> Developer
Select "Copy Url" to copy your private MCP endpoint
Step 2
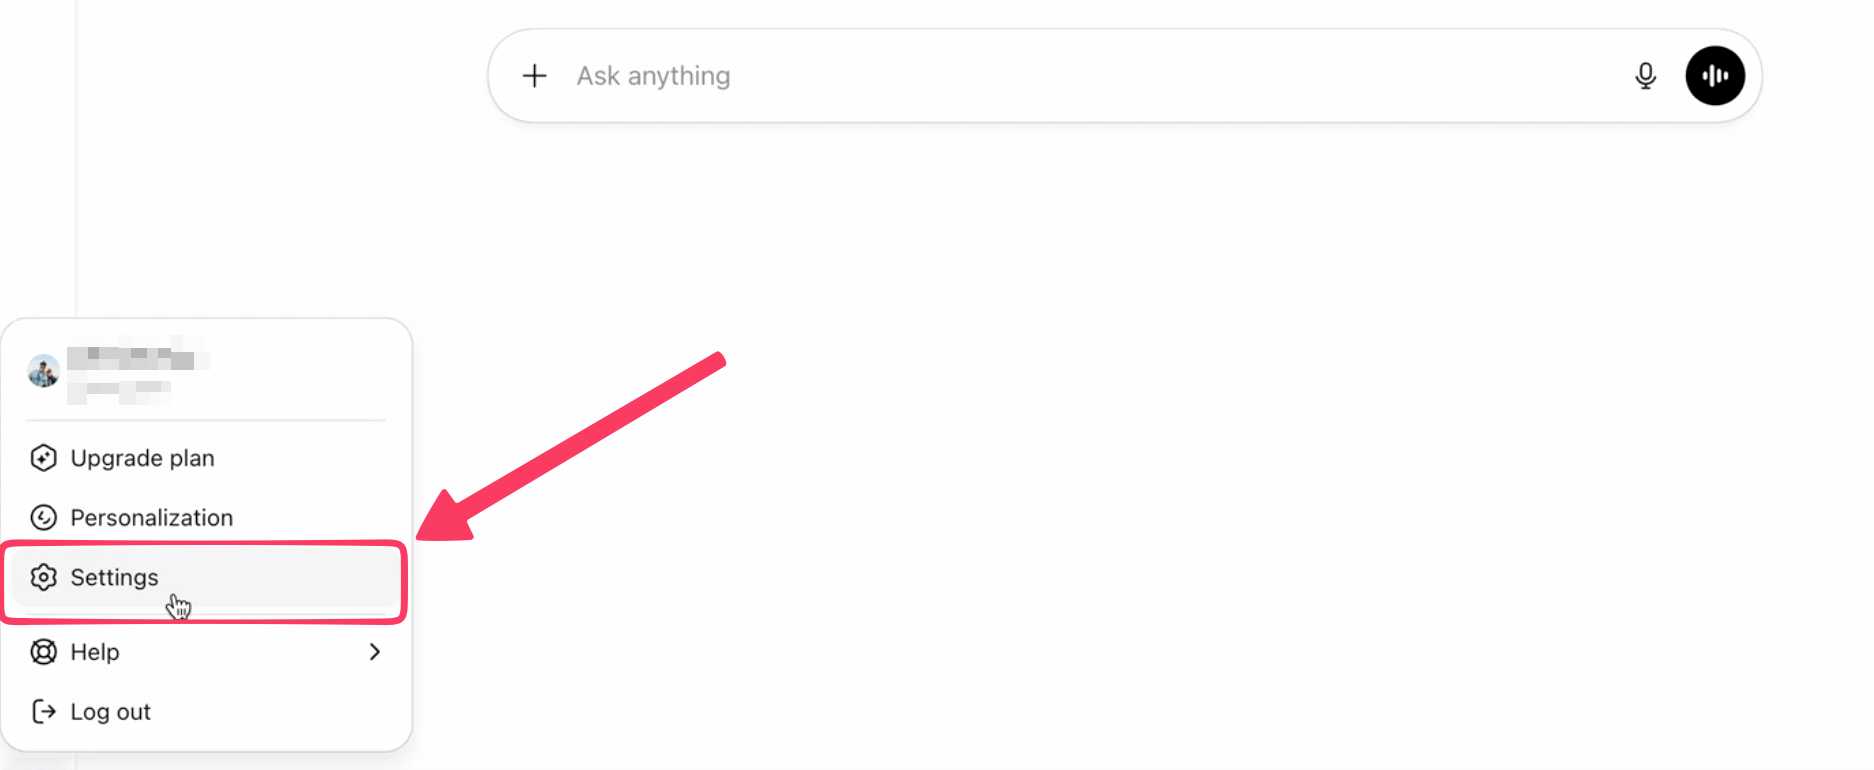
Open the "Settings" menu in ChatGPT
Step 3
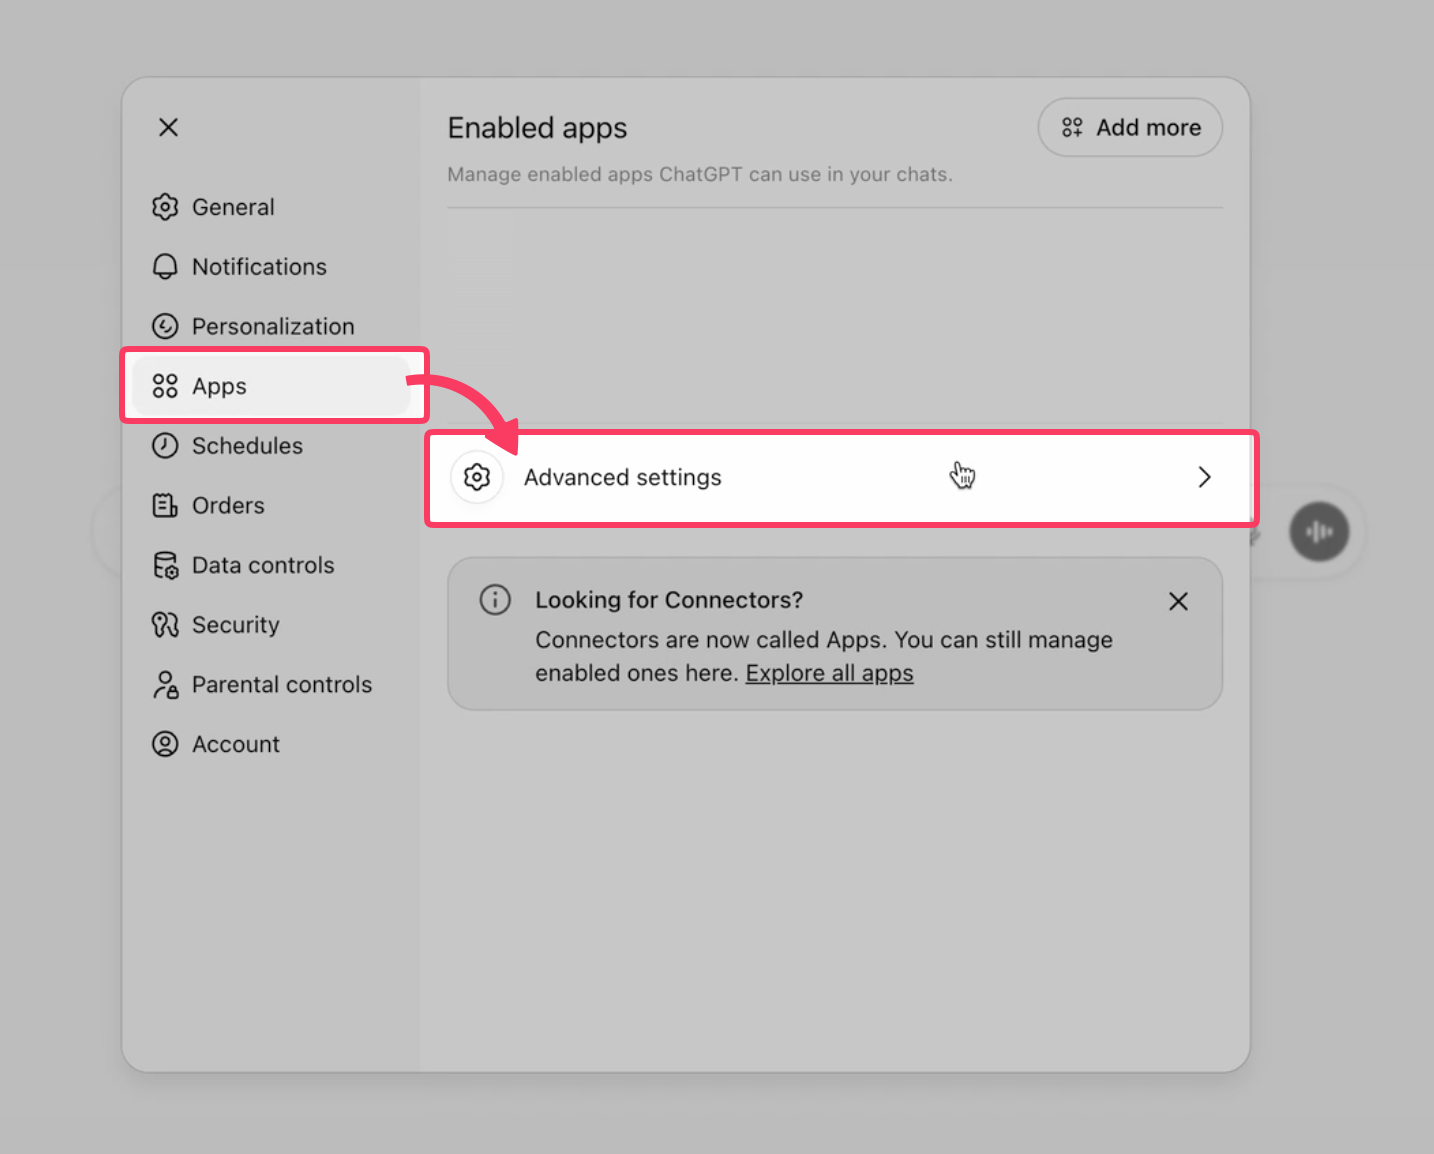
Inside "settings":
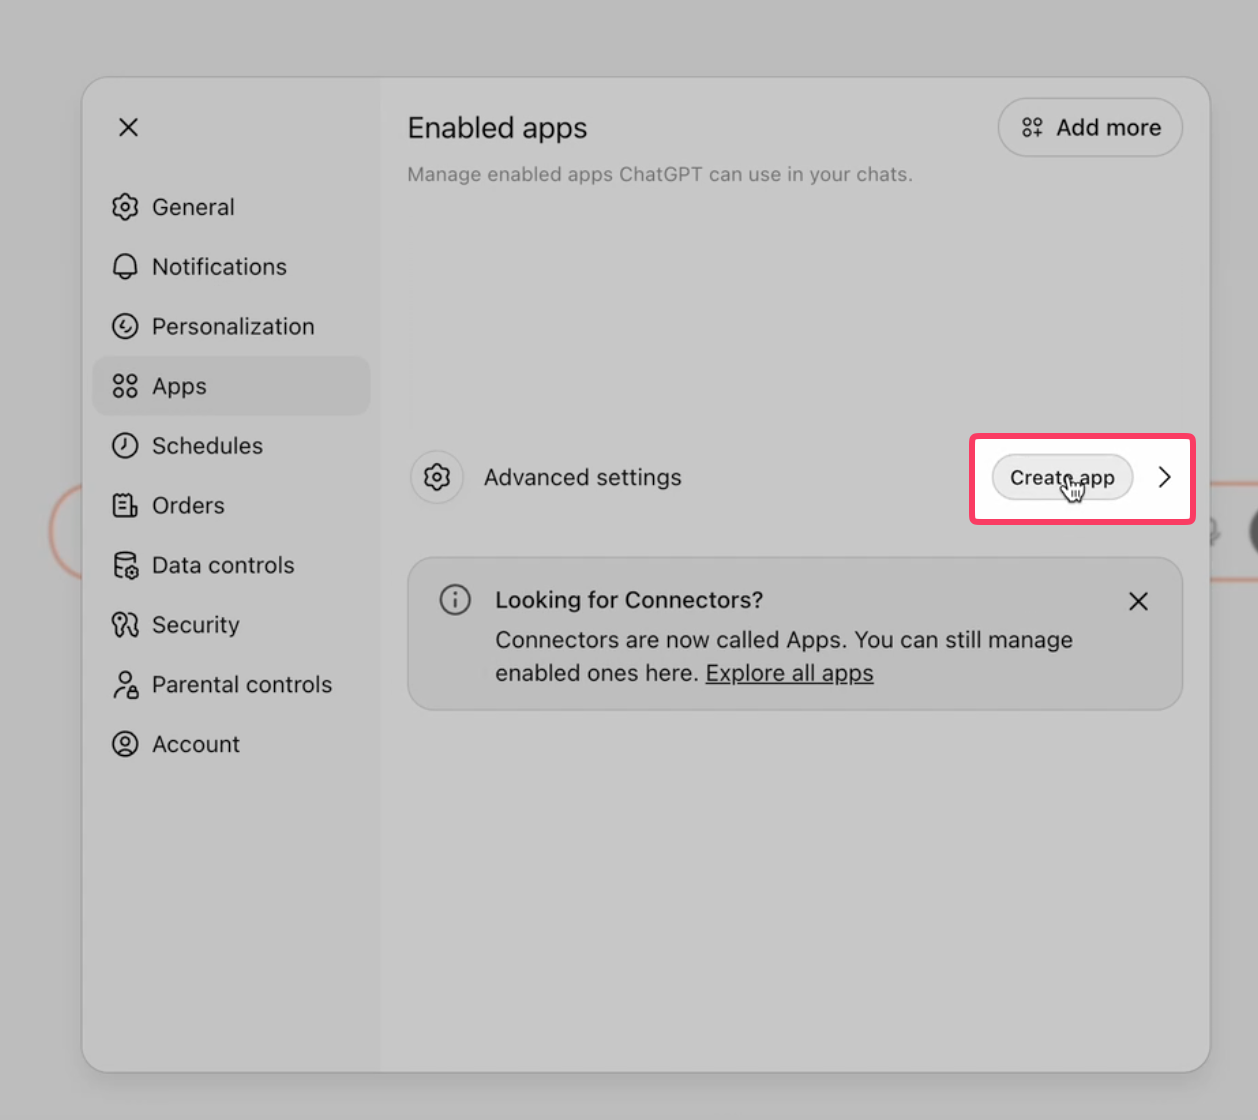
Click "Apps" -> "Advanced Settings"
Step 4
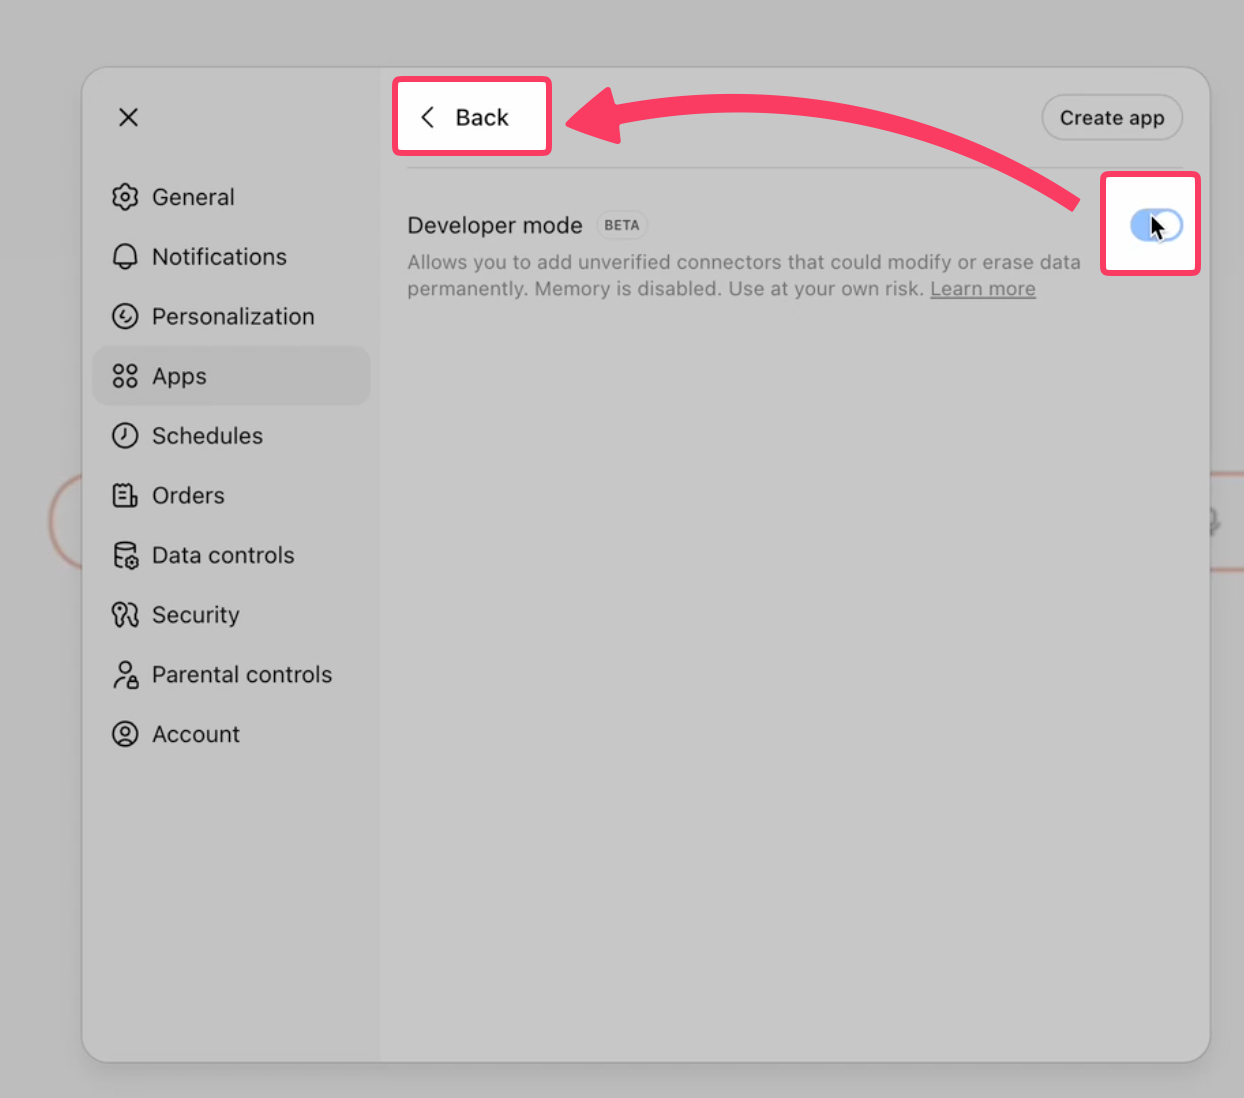
Turn on Developer Mode
Step 5
In the Apps menu, select "Create app"
Step 6
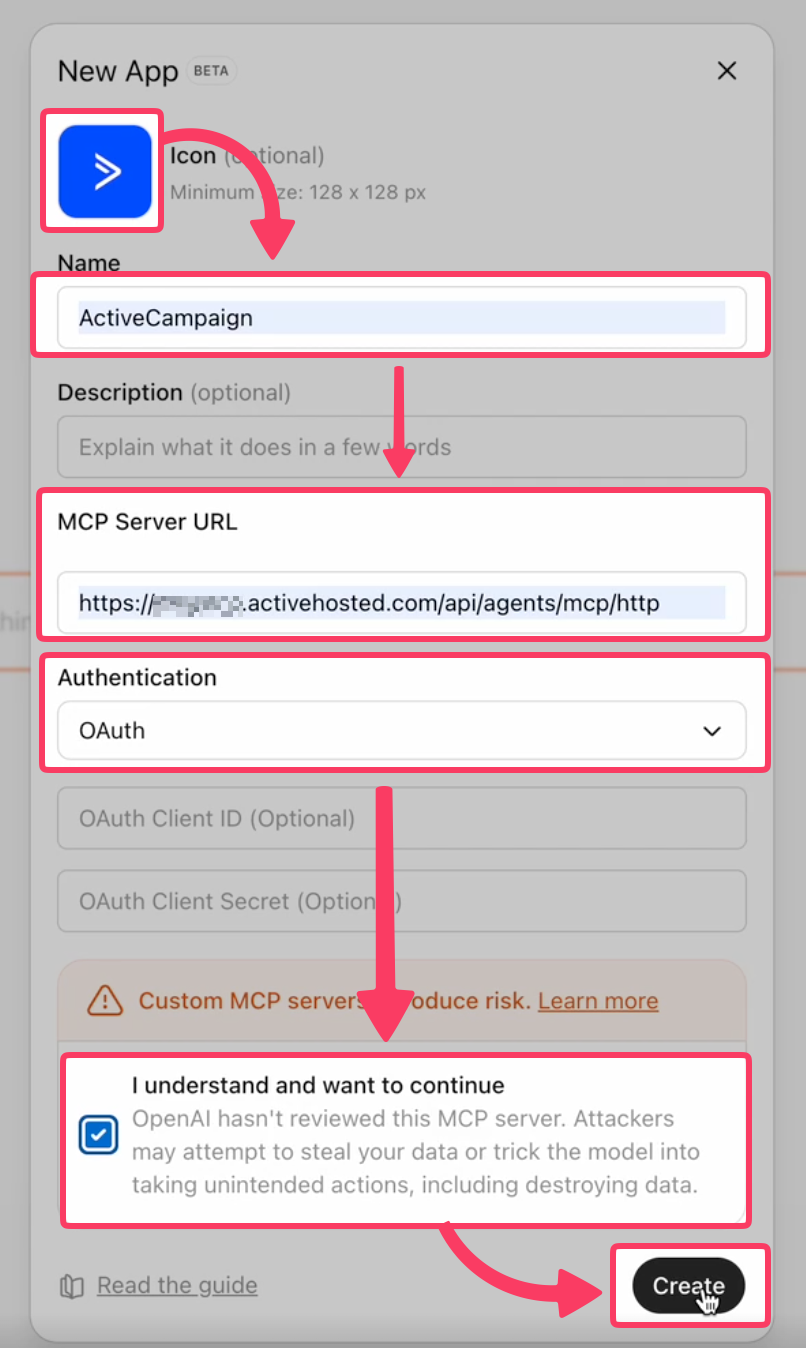
Provide the following:
Icon: Optional, but we recommend this one
Name: ActiveCampaign
Description: (Optional)
MCP Server URL: Paste your private MCP endpoint you copied from Step 1
Authentication: Leave as OAuth
Once complete, select "Create"
Step 7
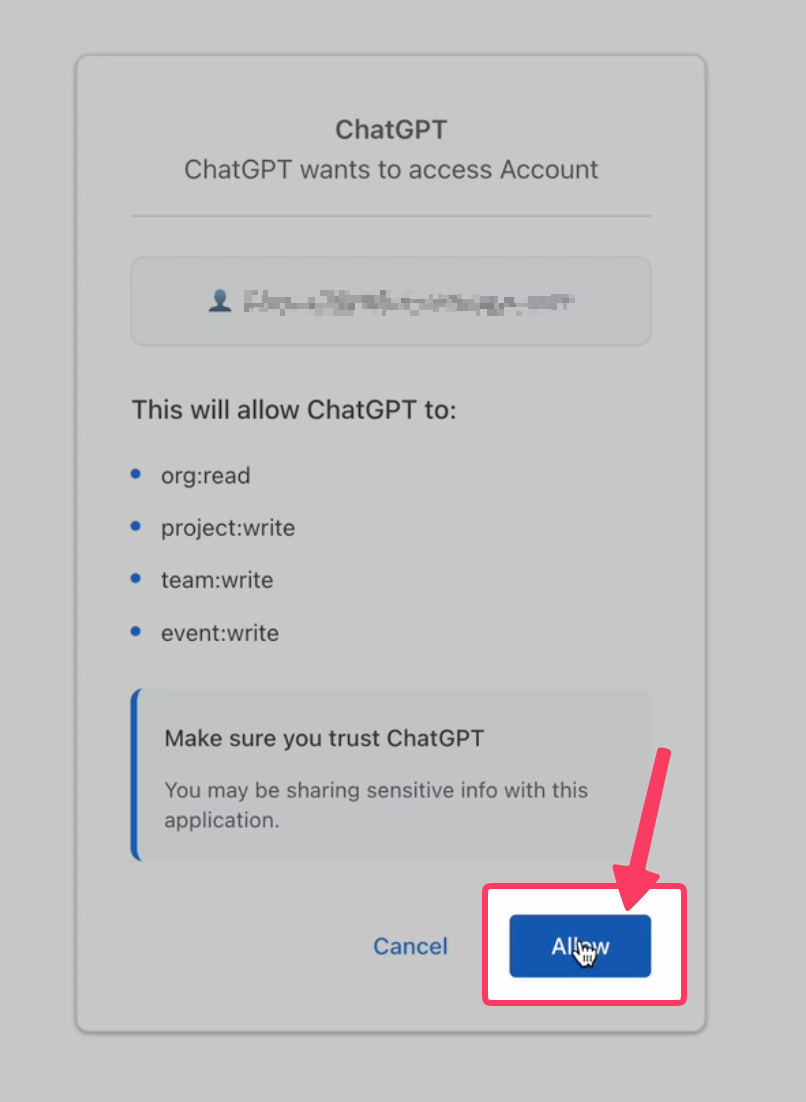
In the window that appears, authenticate with ActiveCampaign
Select "Allow"
Step 8
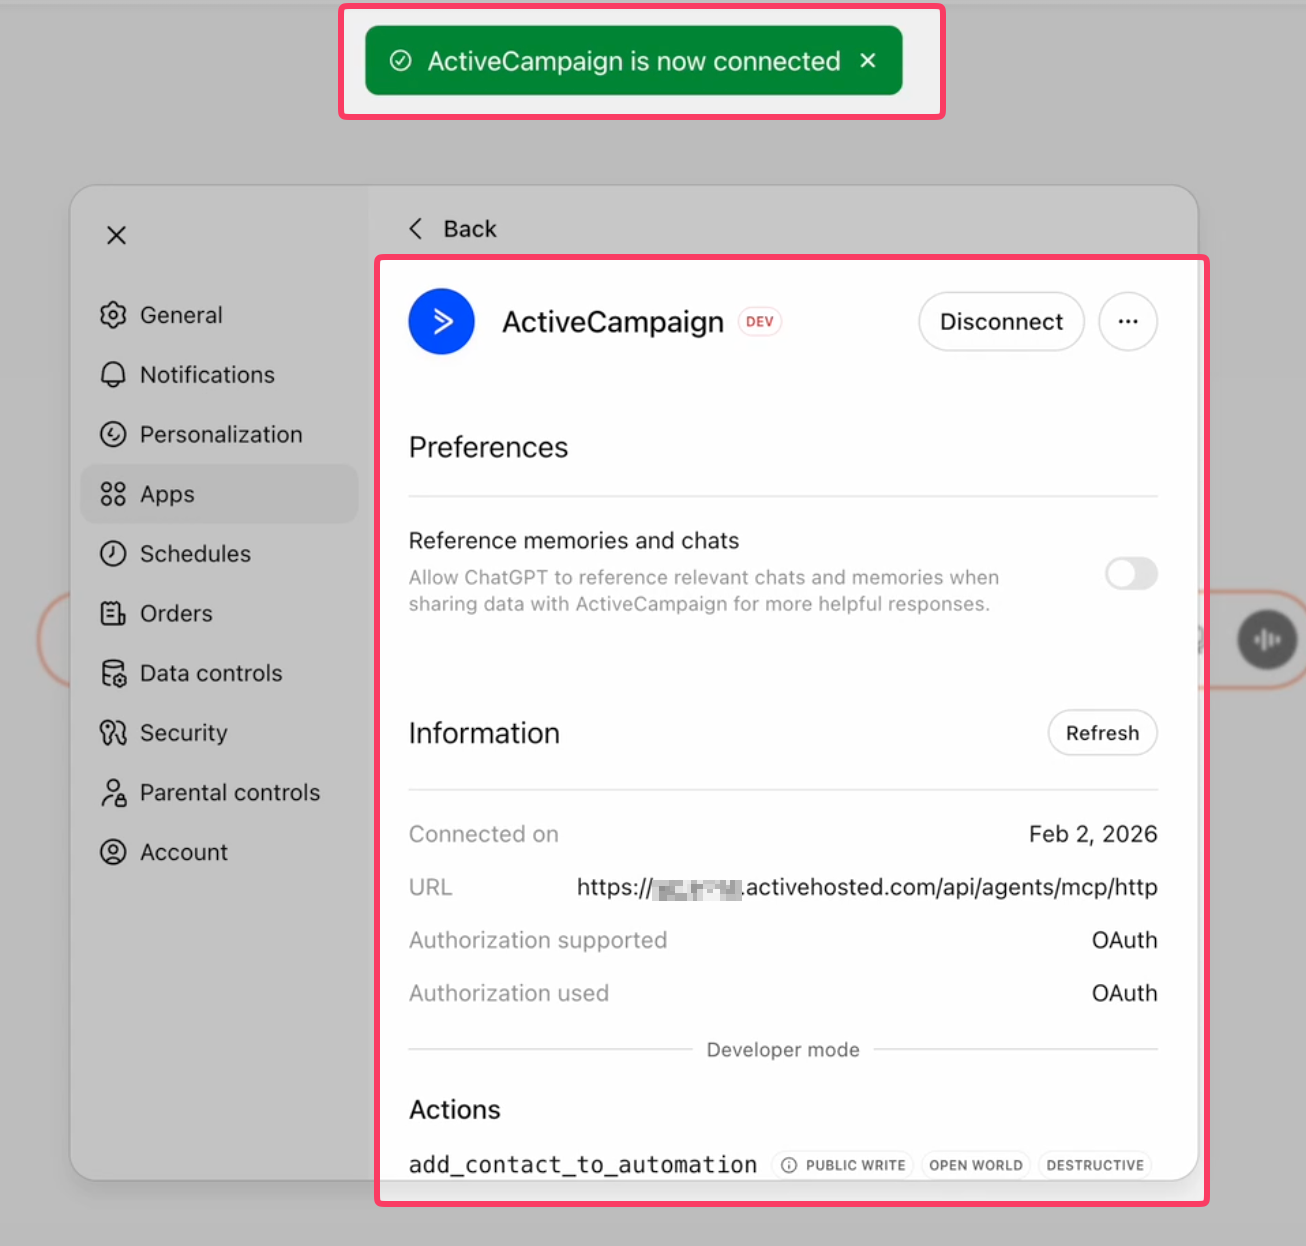
You should now see the ActiveCampaign MCP server is connected. view.
Step 9
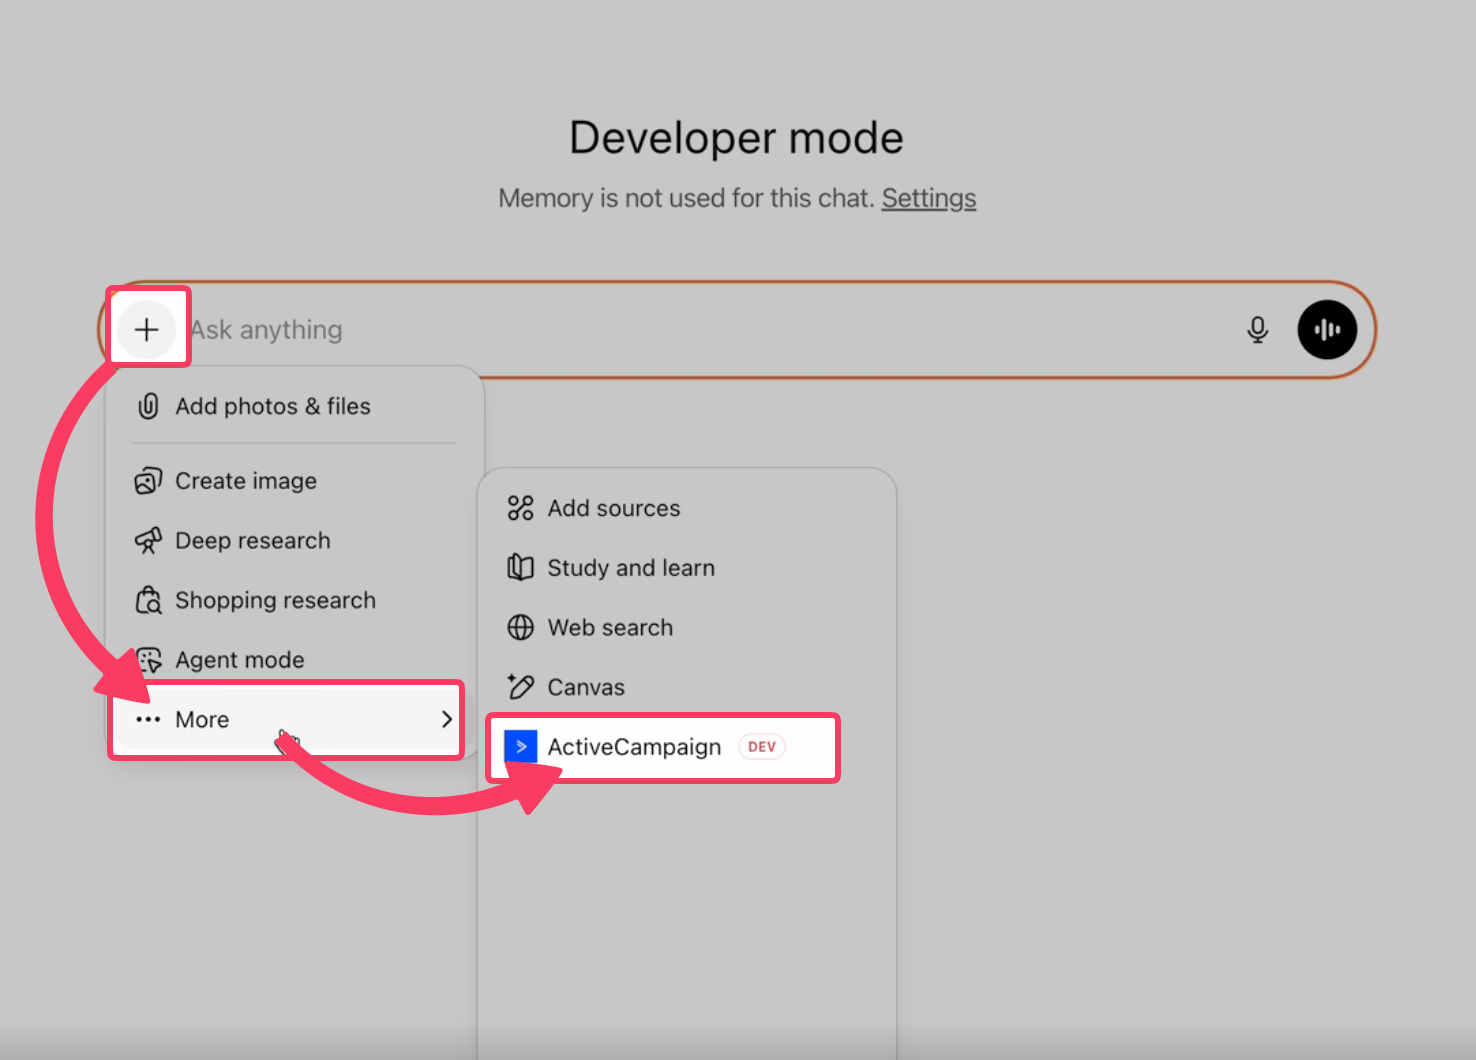
In the ChatGPT prompt interface, click the + icon
Select "More"
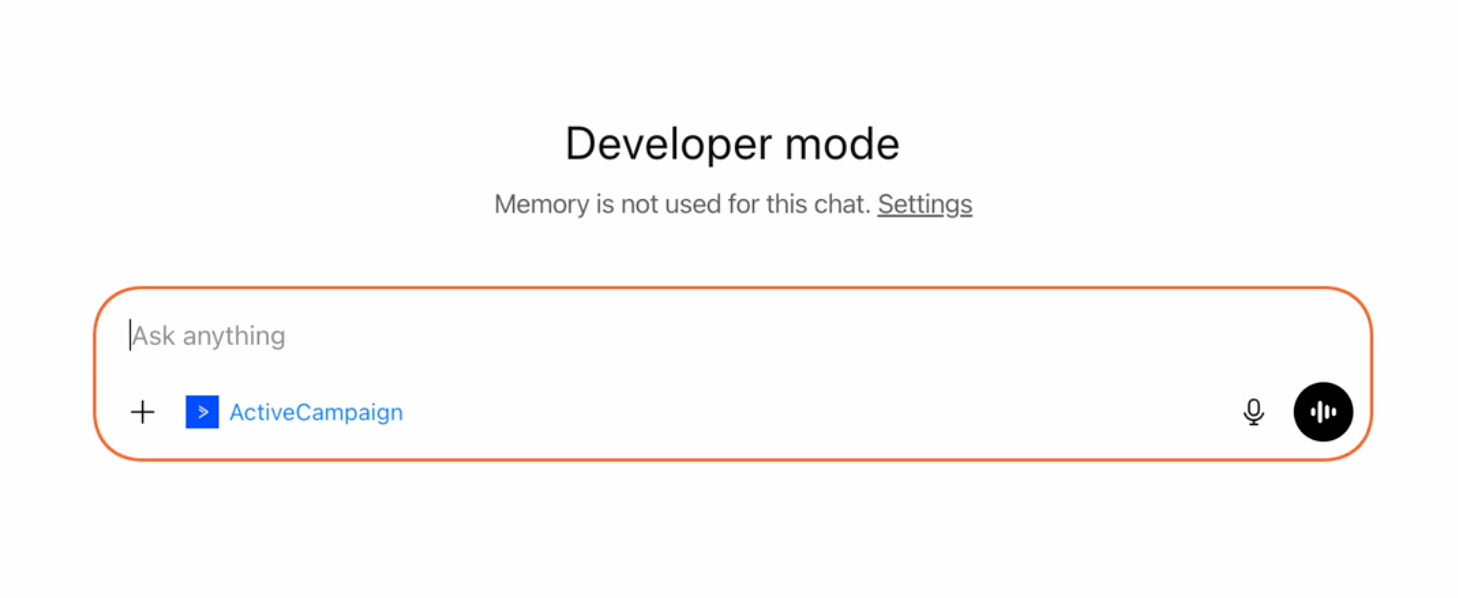
Select ActiveCampaign
Step 11
🎉 You may now ask ChatGPT questions about your ActiveCampaign account! 🎉
After connecting to the ActiveCampaign MCP Server, your ChatGPT instance may show: "This MCP server can't be used by ChatGPT to search information..." - Our MCP server is optimized for speed and reliability. While it doesn’t include deep research capabilities, full functionality is available when Developer Mode is enabled.
Need some inspiration?
See some example prompts ▸