Commands, Variables, Properties
Developer commands can execute custom logic to make API requests, parse API responses, and combine multiple commands together.
Each command is described below along with a few examples.
JSON does not support comments. We defined the _comment property to support comments in the application configurations. It supports both single-line and multi-line comments.
Examples:
"_comment": "This is a single-line comment""_comment": [
"Comment line #1",
"This is a multi-line comment"
]The !jq command is used to manipulate JSON using jq expressions. jq is an open-source query language for JSON. The output from a !jq command can serve as input into other commands or steps in an integration.
Recommended resources for learning more:
- An Introduction to JQ: an excellent article on learning
jq - jqplay: an online interactive tool for editing and testing
jqexpressions
The !http is used to make API requests to the system you are integrating.
WarningAuthenticated API Requests
When a user connects an integration with a service provider, we utilize the specified authentication method as indicated in the
authobject of the configuration file.If
authis configured asoauth2, the App Studio service will continue to use the same access token created when the customer connected the integration. If the access token needs to be refreshed, the App Studio service will attempt refresh the token up to three times. If the token fails to refresh after three attempts, an error is recorded and the customer is notified.
An !http command is defined by the following properties:
| Key | JSON Type | Required | Default Value |
|---|---|---|---|
path | string | no | |
url | string | no | |
target | string | no | "connection" |
method | string | yes | "GET" |
body | object | no | (empty object) |
params | object | no | (empty object) |
headers | object | no | (empty object) |
This is the URL path that is relative to the base_url value.
This is the full URL path for the request, if used instead of "path", it disregards the base_url value.
The target property is used to specify the API to send the HTTP request. The three possible values are "connection", "activecampaign", and "external". When the value is set to "connection", the request will be sent to the external API URL specified in the api object, using the authorization provided in the "auth" section of the config. When the value is set to "external", an HTTP call is sent without using the connected authorization/"auth" object. When the value is set to "activecampaign" the request will be sent to the current ActiveCampaign account. All v3 API endpoints are supported with the exception of events and site tracking. If the target property is not specified, the default value is "connection".
{
  "!http": {
    "target": "activecampaign",
    "method": "GET",
    "path": "api/3/tags"
  }
}
Rules for Targeting ActiveCampaign APIsWhen the
targetproperty is set to"activecampaign", the following rules apply.
- The
pathmust be a relative URL path to a valid ActiveCampaign API endpoint. Thepathcannot contain the host name (e.g.https://your-domain.activehosted.com).- All v3 API endpoints are supported with the exception of events and site tracking.
The method is the HTTP method that should be used when making an HTTP request to the API endpoint. The method is limited to the following values: GET, POST, PUT, PATCH, DELETE, and OPTIONS.
The body is the body of an HTTP request as JSON.
WarningCurrently, App Studio only supports valid JSON as the
bodyof a request.
In this example, we are using the body object to post JSON to a webhook resource.
"!http": {
  "path": "repos/${resource::id}/hooks",
  "method": "POST",
  "body": {
    "enabled": true
  }
}The params are key/value pairs that are appended to the path of an HTTP request. These are often referred to as query string parameters.
In the following example, the param object is used to include a sort query string parameter with the request. The resulting path would be repos?sort=desc.
"!http": {
  "path": "repos",
  "method": "GET",
  "params": {
    "sort": "desc"
  }
}
headers specifies the HTTP headers that are sent in response to the third-party API requests. It is optional and will default to if not defined.
The !respond command generates an HTTP response to the incoming webhook validation request with the expected headers, status code, and body. It was created to offer the flexibility to define custom HTTP responses as per the requirements of the third-party API.
| Key | JSON Type | Required | Possible Values |
|---|---|---|---|
process_payload | boolean | no | true, false(Defaults false) |
code | int | no | Any valid HTTP status code (Defaults 200) |
headers | object | no | Any valid object (Defaults to empty object, {}) |
body | object | no | Any valid object (Defaults to empty object, {}) |
There is no way to differentiate between incoming webhook validation or re-validation requests and webhook payload requests. The process_payload property helps us determine this. It is optional and defaults to false. In the example verification object the !switch statement contains a first !respond command that defines the HTTP response that needs to be sent to the third-party API and the second !respond command lets us know that the request is a webhook payload. Using them in the !switch command's cases property let's us perform both webhook verification and payload processing.
You must set aprocess_payloadwhen using!respondA
!respondcommand with theprocess_payloadproperty set totrueis required to process webhook payloads. If it is not defined in the!switchcommand’s cases property, the incoming webhook payload is not processed.
process_payload propety not defined; defaults to false:
{
   "!respond": {
      "code": 200,
      "headers": {
         "Content-Type": "application/json"
      },
      "body": {
         "challengeCode": "challenge-code"
         "challengeResponse": "hash-value"
      }
   }
}
process_payload property defined, required to process webhook payloads:
{
  "!respond": {
    "process_payload": true
  }
}
code specifies the HTTP code that is sent in response to third-party API requests. It is optional and will be set to 200 if not defined.
Any properties defined in the headers object will be added to the headers of the HTTP request.
In the following example, the headers object is used to specify the content-type of the request.
"!http": {
  "path": "repos",
  "method": "GET",
  "headers": {
    "content-type": "application/json"
  }
}body specifies the HTTP body that is sent in response to the third-party API requests. It is optional and will default to an empty {} if not defined.
"!http": {
  "path": "repos",
  "method": "GET",
  "params": {
    "sort": "desc"
  }
}
Most often the response of an !http command will be piped to a !jq as part of a !pipe command to map the response to a specific format. The entire response of an !http command can be referenced using .body. Imagine the response from your API (internally to App Studio) looks something like the following.
{
  "body":  // the response from your API
}
Note: Use .body for APIs that return ArraysIf your API returns a top-level array, the
.body[]syntax is required to properly handle the response.
Does your system require registering webhooks via a developer portal?If you cannot create a webhook URL via the API (by defining a data_intake create section), then check if the third-party system has a developer portal that lets you register a webhook URL. If that's the case, please follow the instructions below:
The webhook URLs generated for such use cases are usually application-level webhooks. Ensure to set the
data_intakescope value asapplication.Please create your application and add the configuration with the webhook verification section defined in App Studio.
Connect an account, then create and save a mapping to generate the webhook token required to generate the webhook URL.
Please reach out to us at [email protected] with your application name, and we will custom generate the webhook URL for your application.
The !sha command generates hash values using a hash function. It accepts a value_to_encrypt input along with secret and algorithm properties to create an encrypted hash.
Example:
"data_pipeline": {
  "source": {
    "!resource": "ActiveCampaignContact"
  },
  "target": {
    "!pipe": [
      {
        "_comment": "the value_to_encrypt will be piped to !sha so it can be hashed",
        "!jq": "{value_to_encrypt: \"SOME_VALUE\"}"
      },
      {
        "!sha": {
          "_comment": "the value_to_encrypt value will be hashed using the hash function and will be returned as hash",
          "algorithm": "sha256"
        }
      },
      {
        "!http": {
          "_comment": "we can access the generated hash value from the piped_content",
          "method": "POST",
          "body": {
            "email": "${piped_content.0.email}",
            "super-secret-value": "${piped_content.1.hash}"
          },
          "url": "https://some-url-here.com/do_something"
        }
      }
    ]
  }
}| Key | JSON Type | Required | Possible Values |
|---|---|---|---|
secret | string | no | Any string value that represents a app’s client secret or a secret key defined in the account |
algorithm | string | yes | "md5", "sha1", "sha224", "sha256", "sha384", "sha512", "sha3_224", "sha3_256", "sha3_384", "sha3_512", "shake_128", "shake_256","blake2b", "blake2s" |
Your application’s client secret or a secret key defined in the customer’s account or developer portal acts as a secret to generate the challenge code hash response. It is optional and depends on the third-party system requirements.
{
  "!sha": {
    "secret": "a-secret-value-used-as-the-salt",
    "algorithm": "sha256"
  }
}
{
"!sha": {
"algorithm": "sha256"
}
}Output:
{"value_to_encrypt": "value_passed_in", "hash": "hash_of_value_passed_in"}
!shacommand requiresvalue_to_encryptThe
!shacommand requires avalue_to_encryptinput to be extracted from the incoming webhook validation or re-validation request, defined in a !pipe command. The output of the first command is passed as input to the next command in the!pipedefinition.
Example:
"!pipe": [
  {
    "!jq": "{value_to_encrypt: .query_params.challengeCode}"
  },
  {
    "!sha": {
      "secret": "12345_thisIsASecret_54321",
      "algorithm": "sha256"
    }
  },
  {
  "!print_c": "The value_to_encrypt unencrypted is: ${piped_content.2.value_to_encrypt}"
  },
  {
  "!print_c": "The value_to_encrypt encrypted is: ${piped_content.2.hash}"
  }
]The algorithm is a required property in !sha commands. It specifies the hash algorithm that needs to be used to generate the HMAC response that should be sent back to the third-party API. We support all the hash functions mentioned in the table above.
The !respond command generates an HTTP response to the incoming webhook validation request with the expected headers, status code, and body. It was created to offer the flexibility to define custom HTTP responses as per the requirements of the third-party API.
The !pipe command allows multiple commands to be chained in specific order.
When commands are chained, the output of one command becomes the input to the next command.
"!pipe": [
  {
    "!http": {
      "path": "repos",
      "method": "GET"
    }
  },
  {
    "!jq": ".body.repositories | map( { name: .name, id: .id } )"
  }
]
In the previous example, the result of the !http command is passed to a !jq command. The result is to map the response's repositories array and return a more simple array of objects with only name and id properties.
When you need to access output from a command that's not immediately before the current command, you can use the variable syntax ${piped_content.<index>} where <index> is the position of the command. From the previous !pipe command example,
${piped_content.0}refers to the input data for the pipe command${piped_content.1}refers to the output of the!httpcommand${piped_content.2}refers to the output of the!jqcommand
All ${piped_content} refer to outputs generated immediately before them.
The !print_c command is intended to help with the development and debugging of your application. When executed, the !print_c command will create a new App Studio Log entry with the command's string value. Variable syntax, such as ${piped_content.0} is also supported. The !print_c command does not impact data flow. This means that when !print_c is used in a !pipe command, the data output from !print_c will be the same as the input.
"!pipe": [
  {
    "!print_c": "Starting HTTP Request"
  },
  {
    "!http": {
      "path": "contact",
      "method": "GET"
    }
  },
  {
    "!print_c": "HTTP Result: ${piped_content.2}"
  }
]
This example will result in two App Studio Log entries. The first will be a simple string "Starting HTTP Request". The other log entry will be a string that starts with "HTTP Result: " and then contains the JSON output from the !http command, which was referenced with the variable ${piped_content.2}.
Using!print_cfor debuggingUsing
print_cwith the variable syntax can be helpful when debugging your application, as it can help you understand exactly what data is being held in a variable at a given point in your app's execution.
The log entries will appear in the App Studio Logs tab as follows:

The !extract command allows developers to extract JSON strings from incoming webhook payloads and parse them into JSON objects.
Usage:
{
  "!extract": {
    "item_keys": list[string] // the field(s) containing the JSON to be extracted
    "to_json": boolean        // whether the fields need to be converted from a JSON string
  }
}
Examples:
This is an example application/x-www-form-urlencoded payload from Unbounce:
"page_url": "http://unbouncepages.com/wanderpath-2898/",
"page_name": "WanderPath",
"page_id": "69e2421e-df14-4196-89c5-8adf5ac0676c",
"variant": "a",
"data.json": "{\"email\":[\"[email protected]\"],\"first_name\":[\"Jane\"],\"last_name\":[\"Doe\"],\"phone_number\":[\"5555555555\"],\"variant\":[\"a\"]}",
"data.xml": "<?xml version=\"1.0\" encoding=\"UTF-8\"?><form_data><email>[email protected]</email><first_name>Jane</first_name><last_name>Doe</last_name><phone_number>5555555555</phone_number><variant>a</variant></form_data>"
An example data_pipeline that extracts the data.json string and serializes it to JSON when processing looks like this:
"data_pipeline": {
  "source": {
    "!pipe": [
      {
        "!extract": {
          "item_keys": [
            "data.json"
          ],
          "to_json": true
        }
      },
      {
        "!jq": ".[] | to_entries as $t | [$t[] | select(.value[]!=\"\") | {key, value: .value[]}] | from_entries | select(.variant!=null) | .+ {_tags: [.variant]}"
      }
    ]
  },
  "target": {
    "!resource": "ActiveCampaignContact"
  }
}The !resource command allows developers to use resources within ActiveCampaign. Currently supported resources:
- ActiveCampaignContact
- ActiveCampaign
To get specific information about an ActiveCampaignContact resource, such as what fields are available:
"!resource": "ActiveCampaignContact.fields"To refer to concrete instances of contacts:
"!resource": "ActiveCampaignContact"To get specific information about an ActiveCampaign resource, such as what fields are available:
"!resource": "ActiveCampaign.fields"ActiveCampaign Resources
This list describes what can be used with the !resource command.
ActiveCampaignContact
This resource can access contact data for an ActiveCampaign contact. Below are available features.
Available Contact Fields
Usage:
"!resource": "ActiveCampaignContact.fields"Output Example:
[
  {
    "value": "email",
    "display": "Email"
  },
  {
    "value": "firstName",
    "display": "First Name"
  },
  {
    "value": "lastName",
    "display": "Last Name"
  },
  {
    "value": "phone",
    "display": "Phone"
  }
]
Contact Object
Usage:
"!resource": "ActiveCampaignContact" Output Example:
{
  "email": "[email protected]",
  "firstName": "Edward",
  "lastName": "Teach",
  "phone": "(123)456-7890"
}
ActiveCampaignAccount
This resource can access or update data for an ActiveCampaign Account. Below are available features.
Available Account Fields
For use in workflow.setup.map, describe_source, and describe_target fields. Lists all mappable ActiveCampaign Account formatted as mapping options.
Usage:
"!resource": "ActiveCampaignAccount.fieldsSync Account
Creates an account or will update an existing record if it has a matching account name. Follows the same requirements as our API v3 endpoints Create Account and Update Account
Usage:
{
  "!resource": {
    "action": "ActiveCampaignAccount.sync",
    "data": {
     "account": {
        "name": "Example Account",
        "accountUrl": "https://www.example.com",
        "owner": 1,
        "1" : "customFieldValue1"
 	 }
   	}
  }
}
Output:
{"account_id":678}ActiveCampaignDeal
This resource can access or update data for an ActiveCampaign Deal. Below are available features.
Available Deal Fields
For use in workflow.setup.map, describe_source, and describe_target fields. Lists all mappable ActiveCampaign Deal formatted as mapping options .
Usage:
"!resource": "ActiveCampaignDeal.fieldsSync Deal
Creates a deal, attempts to update if an ID field is included in the input. Follows the same requirements as our API v3 endpoints Create Deal and Update Deal .
Usage:
{
  "!resource": {
    "action": "ActiveCampaignDeal.sync",
    "data": {
      "deal":{
        "account": 134,
        "contact": 431,
        "description": "This deal is an important deal",
        "currency": "usd",
        "group": "1",
        "owner": "1",
        "percent": null,
        "stage": "1",
        "status": 0,
        "title": "AC Deal",
        "value": 45600,
        "1" : "customFieldValue1"
 		}
    }
  }
}
Example Output
{"deal_id":567}ActiveCampaign
This resource can access or update data for an ActiveCampaign account. Below are available features.
Access custom fields
Outputs standard and custom fields for a user's contact, account, deal, and private custom objects. They are grouped. For use in the map step, describe_source or describe_target options.
Uses dynamic source fields for Deal Pipeline, Deal Owner, Deal Currency, and Account Owner.
WarningThis is intended for use as a target. Using it as a source is technically possible but not yet directly supported as we currently only support contact-based automation actions.
Usage: ActiveCampaign.fields
Example of its use in the map step for describe_target:
"describe_target": {
            "default_group": "contact",
            "label": "ActiveCampaign",
            "options": {
                "!resource": "ActiveCampaign.fields"
            }
          }
Sync
This resource combines sync commands for Contacts, Deals, Accounts, and Custom Objects. It can be used for all objects at once or a subset. Contact records will be created or updated based on if a matching email is found to already exist. Deals will be created unless an id field is included, in this case an update will be attempted. Accounts will be created or updated based on if a matching account name is found to already exist. Custom Objects will be created or updated based on if a record with a matching external ID field is found to already exist.
All records passed within a single payload to this sync function will be related if possible.
Failure to create or update one record will not cause failure of the overall command, all will be attempted. Only if all records fail to create or update will the command log an error.
Usage:
"!resource": "ActiveCampaign.sync"Input Example:
{
"contact": {
  "email": "[email protected]",
  "firstName": "Edward",
  "lastName": "Teach",
  "phone": "(123)456-7890"
},
"deal":{
    "description": "This deal is an important deal",
    "currency": "usd",
    "group": "1",
    "owner": "1",
    "percent": null,
    "stage": "1",
    "status": 0,
    "title": "AC Deal",
    "value": 45600,
    "1" : "customFieldValue1"
  },
"account": {
    "name": "Example Account",
    "accountUrl": "https://www.example.com",
    "owner": 1,
    "1" : "customFieldValue1"
  },
  "customObjects":[ {
    "schemaId": "schemaID1",
    "externalId": "external-id-that-can-be-updated",
     "my-number-field" : 100
    },
  ...]
}
Example Output:
{
  "contact-id":1,
  "account_id":2,
  "account_contact_id": 12,
  "deal_id":3,
  "external_ids":[4]
}The !switch command is similar to “switch” or “case” statements in many programming languages. It accepts an expression to evaluate and a series of “cases”, only one of which will be executed based on the output of the evaluated expression.
The !switch command has two properties:
jq: The expression to evaluate that will determine which case gets executed. This should be ajqexpression that operates on the output of the command just before the!switch. The output of thejqcommand must be the 0-based index of the case that should be executed.cases: A list of commands, only one of which will be executed based on the output of thejqproperty.
Examples
The following is a very simple example of the !switch statement to show how it works.
{
  "!pipe": [
    {
      "!jq": "${custom_data.user_selected_option.value}"
    },
    {
      "!switch": {
        "jq": "if (. | tonumber) > 3 then 0 else 1 end",
        "cases": [
          {
            "!jq": "{message: \"This will be returned if ${expression} is true\"}"
          },
          {
            "!jq": "{message: \"This will be returned if ${expression} is false\"}"
          }
        ]
      }
    }
  ]
}
A common use of the !switch command is to determine if a record should be created or updated, based on whether it already exists in an external system.
{
  "data_pipeline": {
    "source": {
      "!resource": "ActiveCampaignContact"
    },
    "target": {
      "!pipe": [
        {
          "!http": {
            "method": "GET",
            "path": "/contacts?email=${piped_content.0.email}"
          }
        },
        {
          "!switch": {
            "jq": "if .body.meta.total >= 1 then 1 else 0 end",
            "cases": [
              {
                "!http": {
                  "method": "POST",
                  "path": "/contacts",
                  "body": "${piped_content::0}"
                }
              },
              {
                "!http": {
                  "method": "PUT",
                  "url": "/contacts/${piped_content::1.records[0].id}",
                  "body": "${piped_content::0}"
                }
              }
            ]
          }
        }
      ]
    }
}Within your configuration, you may need to store data to variables for later use. These can be saved in our system with the !save command. They can then can be referenced elsewhere in your configuration using data substitution variables.
"!save": {"scope": "CHANGEME"}The scope value should be the same as the data_intake scope set in the data_intake of the configuration. It can be either workflow, connection or application.
The following example uses the !save command to store a the returned webhook id as a variable named webhook_id. This webhook_id value is needed to later in the application lifecycle to update or delete the webhook.
{
  "!pipe": [
    {
      "!http": {
        "method": "POST",
        "path": "/change/me"
      }
    },
    {
      "!jq": ".body | {webhook_id: .id}"
    },
    {
      "!save": {
        "scope": "workflow"
      }
    }
  ]
}
The !save command will save the !jq output to the App Studio system. Later, it can be access using the following variable.
${data.workflow.webhook_id}The !error command can be used to halt the execution of a pipeline and log a message. The command only supports a static string.
{
  "!error": "A helpful error message"
}All values entered by users in the UI elements defined by the select step of a workflow are saved in our system. They can be referenced elsewhere in your configuration using custom_data substitution variables.
Accessing a value stored in the custom_data object has the following format, where <id> is the id of the select form field and <property> is the name of the property to access (usually value).
${custom_data.<id>.<property>}Each custom data reference MUST follow this format: surrounded by an opening { and closing } curly braces, and prefixed with a dollar sign $.
Custom data are stored in a simplified data structure. Since they represent user input, each entry has two keys:
value: this is the value of user input, it's guaranteed to always existdisplay: this is the label or display users saw when they made a selection in the UI, it exists for all UI elements but "text"
A simplified example of this data structure would look similar to the following.
{
  "dropdown-input-1": {
    "display": "Apple",
    "value": "apple"
  },
  "text-area-1": {
    "display": "",
    "value": "user input as text"
  }
}
To access the display of dropdown-input-1, you would use:
${custom_data.dropdown-input-1.display}To access the value of text-area-1, you would use:
${custom_data.text-area-1.value}The domain for some APIs may vary by subdomain based on the account or organization using the API. The api and auth objects support using a ${subdomain} as part of the URL path. Using the variable will not only prompt customers to enter their specific subdomain during the application setup process, you can also access the value entered by the customer at any other step in the config using the ${subdomain} variable.
There are two options when displaying the subdomain input in the UI.
If the base_url in the configuration includes the ${subdomain} substitution variable then the input will appear with the base_url parts wrapping the input:

Otherwise the input will be shown as:
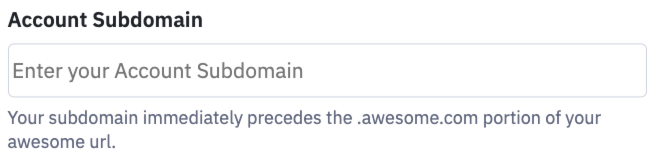
In the following example, only a portion of a configuration is shown.
{
    "$version": "2",
    "api": {
        "base_url": "https://${subdomain}.example.com"
    },
    "auth": {
        "my_oauth2_configuration": {
            "type": "oauth2",
            "configuration": {
                "authorization_base_url": "https://api.example.com/oauth2/authorize",
                "client_id": "woef2qo3hefawWEWrfh2qe21wlvdflkefnqs",
                "client_secret": "[insert your secret here]",
                "scopes": [
                    "insert_scope_here_if_needed"
                ],
                "token_url": "https://api.example.com/oauth/token",
                "refresh_url": "https://api.example.com/oauth/authorize"
            },
            "defined_fields": {
                "subdomain": {
                    "label": "Account Subdomain",
                    "placeholder": "Enter your Account Subdomain",
                    "help_text": "Your subdomain immediately precedes the .example.com portion of your Example url."
                }
            }
        }
    }
}
As can be seen in the previous example, the ${subdomain} variable is being used to replace a portion of the base_url. The ${subdomain} variable can be used throughout your configuration.
Updated about 1 year ago